
Garden Tools Rack – How To Build An OldSchool Organizer
Garden Tools Rack – How To Build An OldSchool Organizer
 Easy shop project for home or school : build a garden tools shelf to organize your tool shed, garage or basement. Watch how I turn a couple of salvage boards and some screws into a handy storage rack perfect for hanging large/long gardening tools out of the way.
Transcript provided for the hearing impaired:
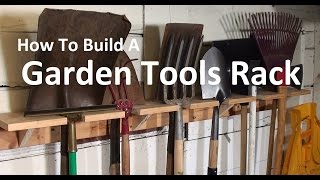
Alright so today on Repairs101 I’m going to show you how I made this handy garden tool organizer out of a couple of boards and a handful of screws.
So I decided enough was enough and that I wasn’t going to store my garden tools in a garbage pail anymore. I still had a couple of salvage boards left and I cut some triangle braces out of scraps. Then I measured and marked to fit the gussets.
Use your speed square to draw parallel lines quickly. Next I found the points on that line to drill my holes.
You know, I chose to use the hole saw and table saw for this project because they make clean and uniform cuts.
You can do all the cutting for this project with a hand saw and a coping saw or with a jigsaw.
Normally I would use a more sophisticated joint like a dado or a mitre joint but for this I thought a simple butt joint clamped with glue and screws was exactly what we needed.
Clean up carpenter’s glue before it cures with a clean damp cloth.
Then I glued in all the gussets and drew them together using the woodscrews.
Always drill out holes before you drive in screws, otherwise you end up with pieces that won’t mate together, split wood and broken screws.
You see I put most of the evidence it’s salvaged wood here on the back where no one will ever see it.
Alright, thanks for watching and don’t forget to subscribe!


Wait…he hung an ax from the shelf? Many carpenters are missing fingers due to projects, but this guy is going to be missing a foot.
Please pardon me if this is a stupid question but is there any place I can find actual instructions for how to build this? I think it’s fantastic but I’m a total newbie. Thank you
Thank you 🙂
And… USA A RIVING KNIFE!
Thanks for the video.
U a Freemason?
I’ve been binge watching your channel all day. So talented and inspiring. 2:52
No miter and your blade is way too high. You are asking for a accident.
LookS good, but couldn’t you get a jigsaw to do the cuttingnh work for that?
What size hole saw bit?
I’ll be making me on day so pump to do it 💪
Thanks for the video. It was perfect for my first real project. I made some small mistakes, but practice makes perfect. Now my shed looks a lot more organized.
Nice idea. I was searching the web for a tool holder and found your video. I’m definitely going to make my own and save some money. Great idea and video. Thanks!
Hi can share the measurements of the holes and size of the board
10K subs and you got game! Great video.
Great video, bought 10 ft 1x 8 pine board today. You should include the dimensions of the triangles, size screws, and where you placed triangle braces on the board. Lettered messaging overlying the video with these so people know exact dimensions. Some of the questions I had were in comment section but please be more specific in future
What kind of wood do u use ! cos i have mostly used plywood and the the normal plywood are quite dark and pricky and i see yours to be of a lighter shade a beige color ! +Repairs101 @Repairs101
Any plans??
If you don’t mind me asking, how much space did you use between center to center of holes? Or to space the tools? Thanks in advance!
That’s a nice project to do
Thanks for this great Idea It came out really good just what I was looking for …
Great video and idea!!
i think ill have to do something like this for my mess of garden tools
LP
Ironically…. I had same idea in my mind and built a very similar unit like yours out of scrap as well. Weird…almost identical. I wanted to add this little tip. Since mine is perhaps a little deeper and can hang several tools in a slot…I added something to keep the rakes and shovels from getting bumped and perhaps falling out/down. I took small hinges and attached small blocks of wood that fit in slot and then hang a yardstick nearby. Then I take yardstick to push up block…place tool in slot…then use yardstick again to “flip” wood back into slot to keep tool from being bumped out. Works great!
fuck you
All you really need for cutting the board is just a jig saw.
Brackets…
Nicely done
Fact: #Christmas is 2 WEEKS from #TODAY!
Fact: #making one of these only takes a couple of hours.
http://youtu.be/0iZ6Sd2dnSE
H
Speed square
Great idea! Thanks
Simple and effective and very timely since I need to make one tomorrow. Organizing my garden shed and never thought of making something like this with my scrap wood. Instead I was counting how many hooks and brackets I had for the tools. This solves it. Many thanks!
Simple u-hooks will do
Many thanks! I made an organizer based on your video and it worked perfectly. Tips such as using glue as also drilling the holes before screwing the screws were very useful. Greets!
No measurements provided 🙁
I need this! haha don’t have the tools though 🙁
Well done video! No bs. Just the important info without all the unneeded blah blah. Good job! 👍🏼
I like the idea that it could also fit more than 1 tool per hole as well. Thanks for the video!
I would recommend that the blade on your table saw be properly adjusted to extend no more than an 1/8" beyond the top of the material. Sawing with the blade extended at the height shown in the video is a very unsafe practice.
I have found that the process of placing or removing the tools sometimes causes the other tools to move. In fact, I have had one fall on me. To prevent that from happening again, I added a bit of trim on each side of the slots on the upper front edge of the board. Now the tools stay in place even when they are jostled about. In addition, I cut the board with slots into short sections and set them to the requirements of the width of the tool. A rake for instance is wider than a hoe or shovel and thus I was able to make best use of the space available. It does require additional support. but it also allows me to store more tools in the same space. You only need one per tool.set close to the slot.
On the second one I built, I fastened a strip of T-slot and used toilet bolts to secure the tool supports to the t-slot strip allowing me to adjust them as required. They simply slide left and right as required. The support holds steady without being fastened to the 2×4 since gravity works. Use plenty of screw in the T-slot to ensure it stays put.
I have young grand kids!! The pitch fork and ax caught my attention immediately. Like your video! Likely be building a couple of these minus sharp or heavy tools on-board. The 16 lb maul in the axes will have to go in a special location.
no saw, sunk.
excellent; i need and AM going to make at least three of these! im fed up with garden tools sprawling over the place and i just built a new garage. great timing! and many thanks.