
DIY CAT SHELF / Plant Shelf / Window Sill Shelf Extension (Give Cats And Plants A Place To Sit!)
DIY CAT SHELF / Plant Shelf / Window Sill Shelf Extension (Give Cats And Plants A Place To Sit!)
 AFFILIATE LINKS FOR TOOLS:
Makita 7-1/4″ Circular Saw:
https://amzn.to/3bTcRz3
Bosch 12 amp Router:
https://amzn.to/2PqDmUO
Dewalt 18ga Brad Nailer:
https://amzn.to/3qh2YQM
Porter Cable Compressor:
https://amzn.to/2O0QqA1
Swanson Speed Square:
https://amzn.to/2MMoUpf
(These are affiliate links. When you shop through these links, we receive a small commission at NO EXTRA CHARGE TO YOU. We greatly appreciate the support!)
FOLLOW US ON INSTAGRAM:
https://www.instagram.com/thehonestcarpenter
FOLLOW US ON LINKEDIN:
https://www.linkedin.com/in/thehonestcarpenter
Here’s a link for the “Trim Rot Repair” video mentioned above:
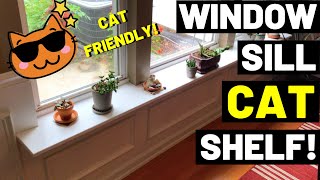
A window sill shelf gives you more room for plants and decorations–and, of course, cats! This short video from The Honest Carpenter will show you how to build and install your own window sill shelf extension with a minimum of material and labor. This is a perfect cat shelf / plant shelf! Give your cat a place to perch 🙂
Typical window sills (or “stools”) are only 3-5″ deep. This window sill shelf extension is 9″ deep, about the depth of your average book shelf.
Tool List:
Tape Measure
Circular Saw OR Jigsaw Or Coping Saw
Drill
Router (optional)
Material List:
1×10 pre-primed pine
3″ screws
Caulk
Liquid Nails
Primer/Paint
Cat Shelf / Plant Shelf / Window Sill Shelf Extension How-To:
1) Measure existing window sill. Add 1″ to each end for overhang.
2) Mark center of existing sill
3) Cut pre-prime stock to desired measurement with circular saw or jig saw.
4) Mark center of window sill shelf extension piece.
5) Bring piece inside and mark notches for mullions or separations.
6) Measure depth of window bays. Note measurements on board.
7) Plot and cut notches for mullions and separations.
8) If necessary, cut out lower ends of window side casings
9) Slide window sill shelf extension into place. If necessary, cut to make piece fit more tightly.
10) Spread liquid nails in zig-zag pattern on existing window sill. Press new window sill shelf firmly down into place.
11) Pre-drill and countersink screw locations at center of window bays. Drive screws through window sill shelf and original sill, into rough opening framing.
12) Tape, caulk, prime and paint
13) Introduce your cats to the cat shelf / plants to the plant shelf!
That’s how you build a window sill cat shelf / plant shelf extension! If you have any questions, feel free to put them down in the comments section.
Be sure to visit us at The Honest Carpenter website:
www.thehonestcarpenter.com


Very low volume
Cal me crazy but I would have included the words "catwalk" and/or "cat" in the video name
so more people could find this video via the Youtube search engine. You have to search for the
video yourself via the search engine to see how easy it is to find. It is MUCH better to have too many
keywords in the video name than too few.
Very nice.
Why do you leave the old stool in? I am getting ready to replace two that my dog chewed the corners of and I. Was just curious why you would not remove the old one first.
very well explanation & demo!
Nice! Just what I was looking for! Our new house has a loose sill in the front window anyway and since the windiw sets in its own sort of shallow alcove, I thought a faux window seat would be awesome, and the cats WOULD in fact love that view of the neighborhood. Thanks for going through the process and tools used.
Luv this. Fyi your mic volume is recording low
¡Gracias! 😊👍
You didn’t remove the previous window sill?
Wanted to do this in my kitchen, going to be Tricky since i have Andersen windows with handle controls
Really good video! Thanks!
I’ve never seen a floating shelf made this way, I love it! Thank you for all the woodworking tips, great for beginners like me. 4:59
What a big difference a wider window sill makes – beautiful!
That looks classy! Thank you!
I watch every video 👍🏻
Great video and idea. i recently bought one of these Makita magnesium circular saws. If you think about it, next time you make a video using the rip guide, could you go into detail on how that is used and installed. Happy father’s Day
Our windows don’t have side casings, but we would like to add them. I found this video while searching for a way to extend the sill left and right since it’s currently too short for side casings. I think this would work, but I’m wondering if there is a way to also cover the old sill so it doesn’t show from the front (some of our windows are higher and it would be obvious there are two sills). Thanks! 🙂
Great idea, Honest Carpenter 💛Thanks for creating & sharing this video
You are awesome! I am binge watching your videos. Thank you for all the great tips and tutorials.
just the guide i was looking for, thank you
Excellent tutorial!
This video is so helpful ! Thanks So much!!!
Thanks for this! I’m curious if you have suggestions about how to support these without using adhesive, so that they’re removable down the line if I were to want to restore my original wood sills. Would you recommend removing the existing sills and replacing them completely? Would installing some kind of wood bracket support be a good idea in this case?
Brilliant!!!, thank you
Great content with some helpful tips! Thanks for sharing!
I am installing new window, there is no existing sill in place,. Do you think I can skip the 6” sill and use 10” directly or it is better to stack them?
LOVE THIS! Thanks so much for sharing these instructions!
Great idea! for cat and plant lovers like me!
My plants will love you for this!.
Nicely done!
Excellent guide. My wife is going to be thrilled when she can return all of her recently repotted plants to the window. Thank you.
Turn up the volume lol
Great project! Well explained.
Do you have any ideas for apartment dwellers for a removable shelf?
Great job!! Love this! It seems as if you have trim underneath the window sill, did you remove them before adding the extension?
OMG> I need to hire someone to do this! Sacramento.
What do you suggest when it is clear that an existing window sill tips downward from the outside edge in toward the bottom of the window? Should that old still be removed, or can something be used to shim (I doubt that’s the right word) the inside edge of the window sill before the new still is added? Thank you in advance for your help!
Thank you for this easy to follow video! I now feel ready to DIY this project.
You made this look easy enough for me to try, and I’ve always wanted deeper windowsills for my cats. I have a problem, though. From the top of my existing window sill to the edge of the window opening is only 7/16ths of an inch. What kind of wood could I use?
What about adding a window sill to one that doesn’t have one?
Thank you for this! I want to extend the sill so that my cats have a place to sun bathe without the window having to be open for them to have enough space to lay down. There will be happy cats in the nearish future
Beautiful work! Do you think this principle would work to extend the top of an old built-in corner tv cabinet? I want to make my slightly wider flat screen fit rather than tear down the built ins or use up floor space with another tv stand or make holes on the wall for a wall mount swing arm. I’m imagining something like a mantel that would extend the front of the cabinet top just enough for the base of my tv to sit on and quasi "float" in front of the cabinet shelves. Thanks for any suggestions!
how wonderful! i should do this for the twin double hungs in my office !
Hey! Really cool video! I want to make this project with my windows too but don’t know how to finish the wood’s surface. Do you have a video on that?
Thanks for this! Really nice to watch and should help me with a triple window "sill" I’m doing. Using reclaimed doug fir and need to route out the part on the sill so it will sit under my window cranks, so that’s the real bear, but I really appreciate your middle marker tip–hopefully it goes well!
Thanks for the great video. I want to make an extended sill for my plants in a bathroom and still be able to lower & close my blinds, so this helpful.
Thank you for the video! What would you suggest if the original sill that you want to cover is marble?
Is it safe to stand on the extension?
I love it! I need to make one to use for my plants.
Excellent video!
Nice work Ethan. Keep the videos coming